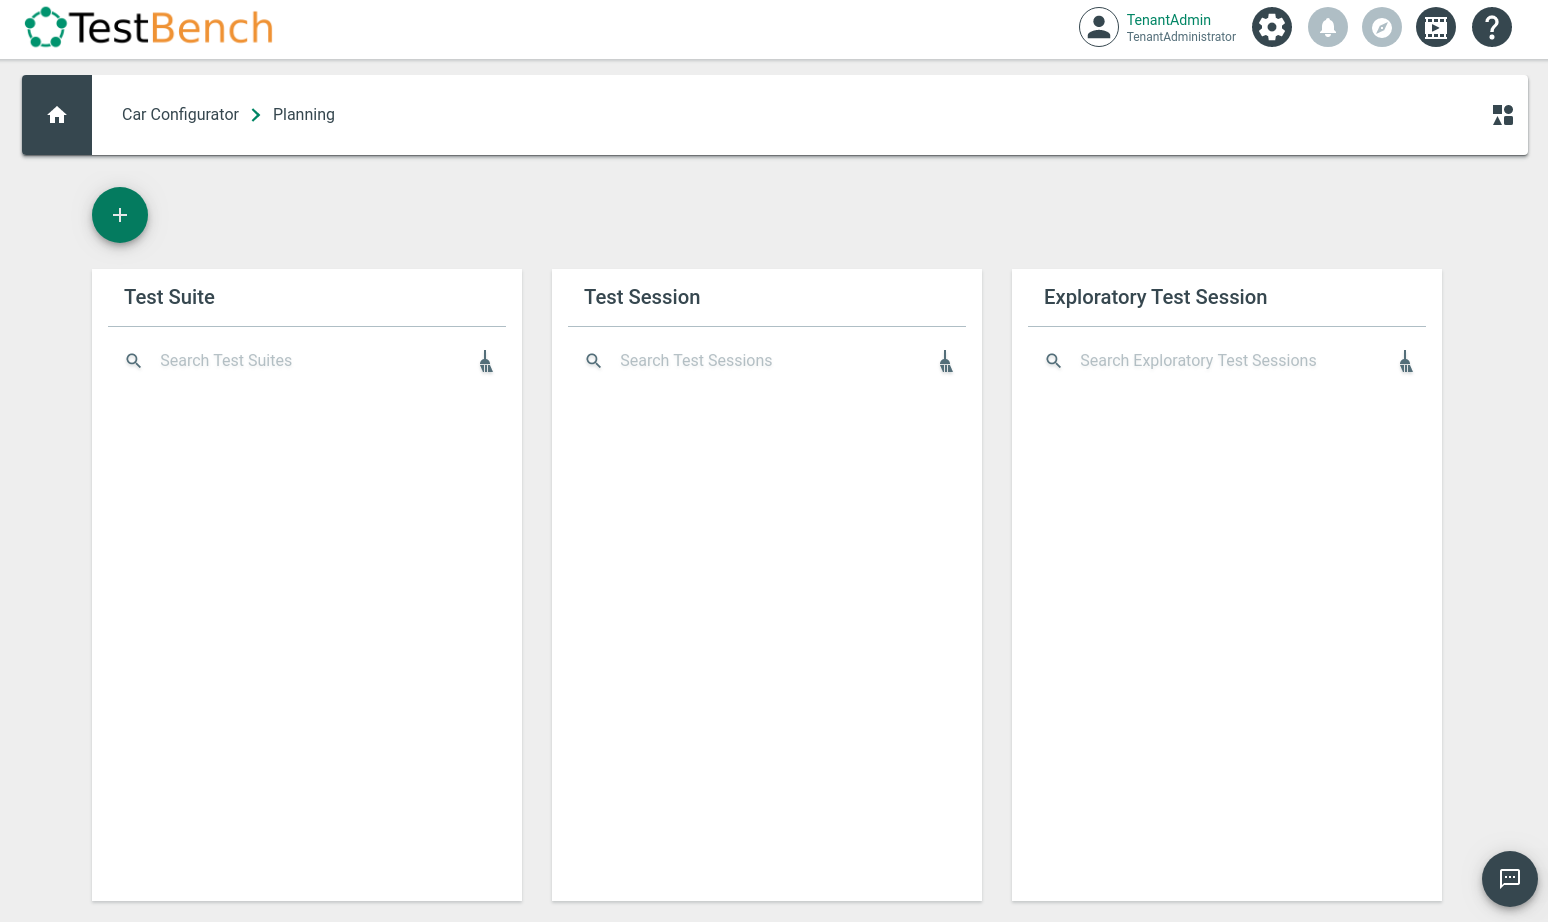
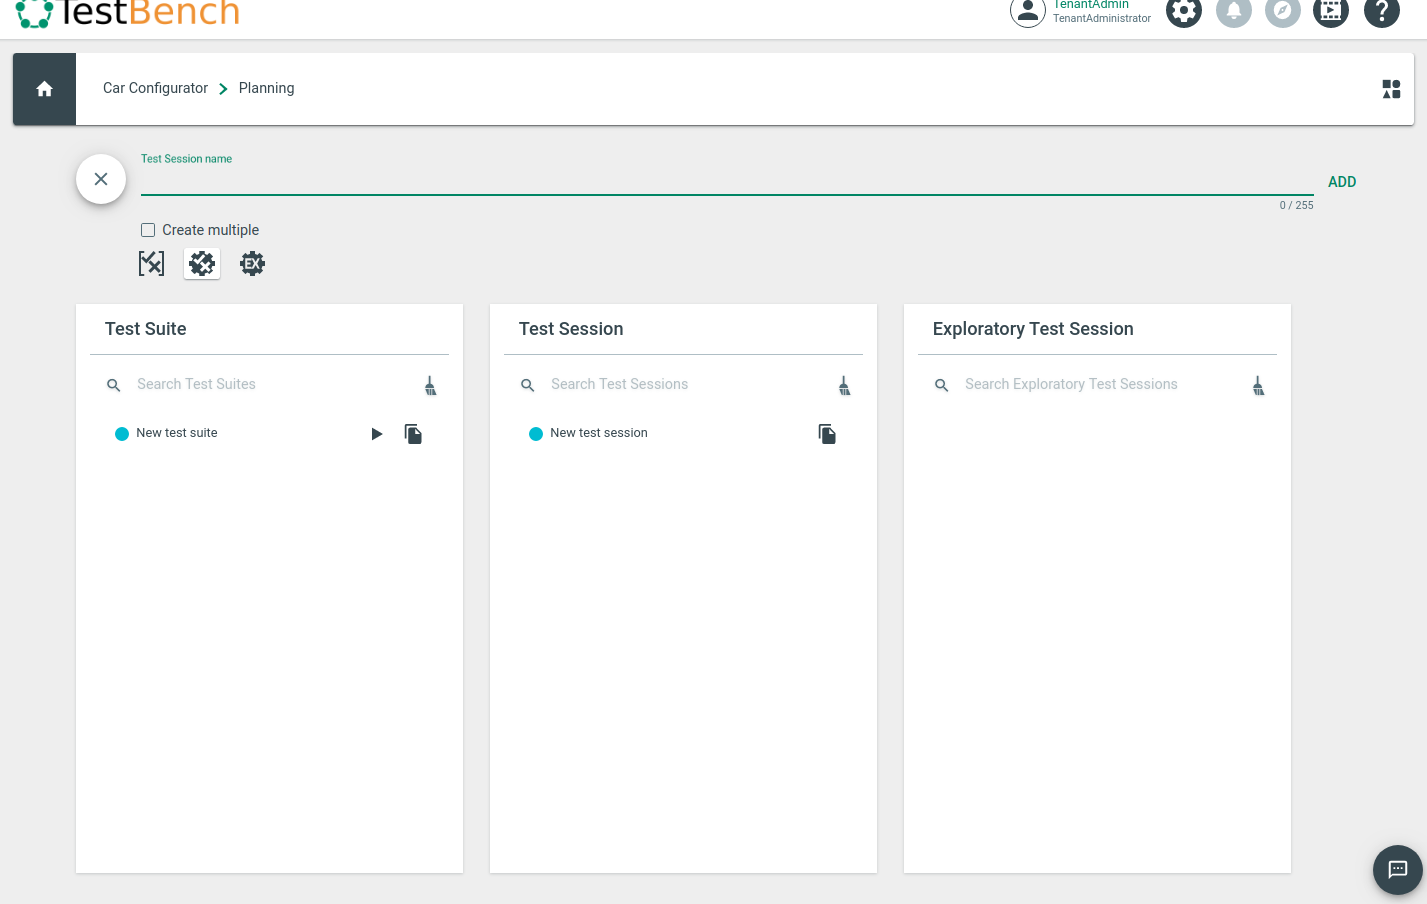
Test Sessions
To create a new Test Session, navigate to the Product Home Screen.

To add Test Executions to a Test Session, you must be an active participant in a Test Session. Navigate to the Specifications Screen and click on the requested Test Cases. If you start an execution, it will be added automatically to the Test Session.
 | Use filtering to choose your Test Cases or choose Test Cases from the Organizer. |
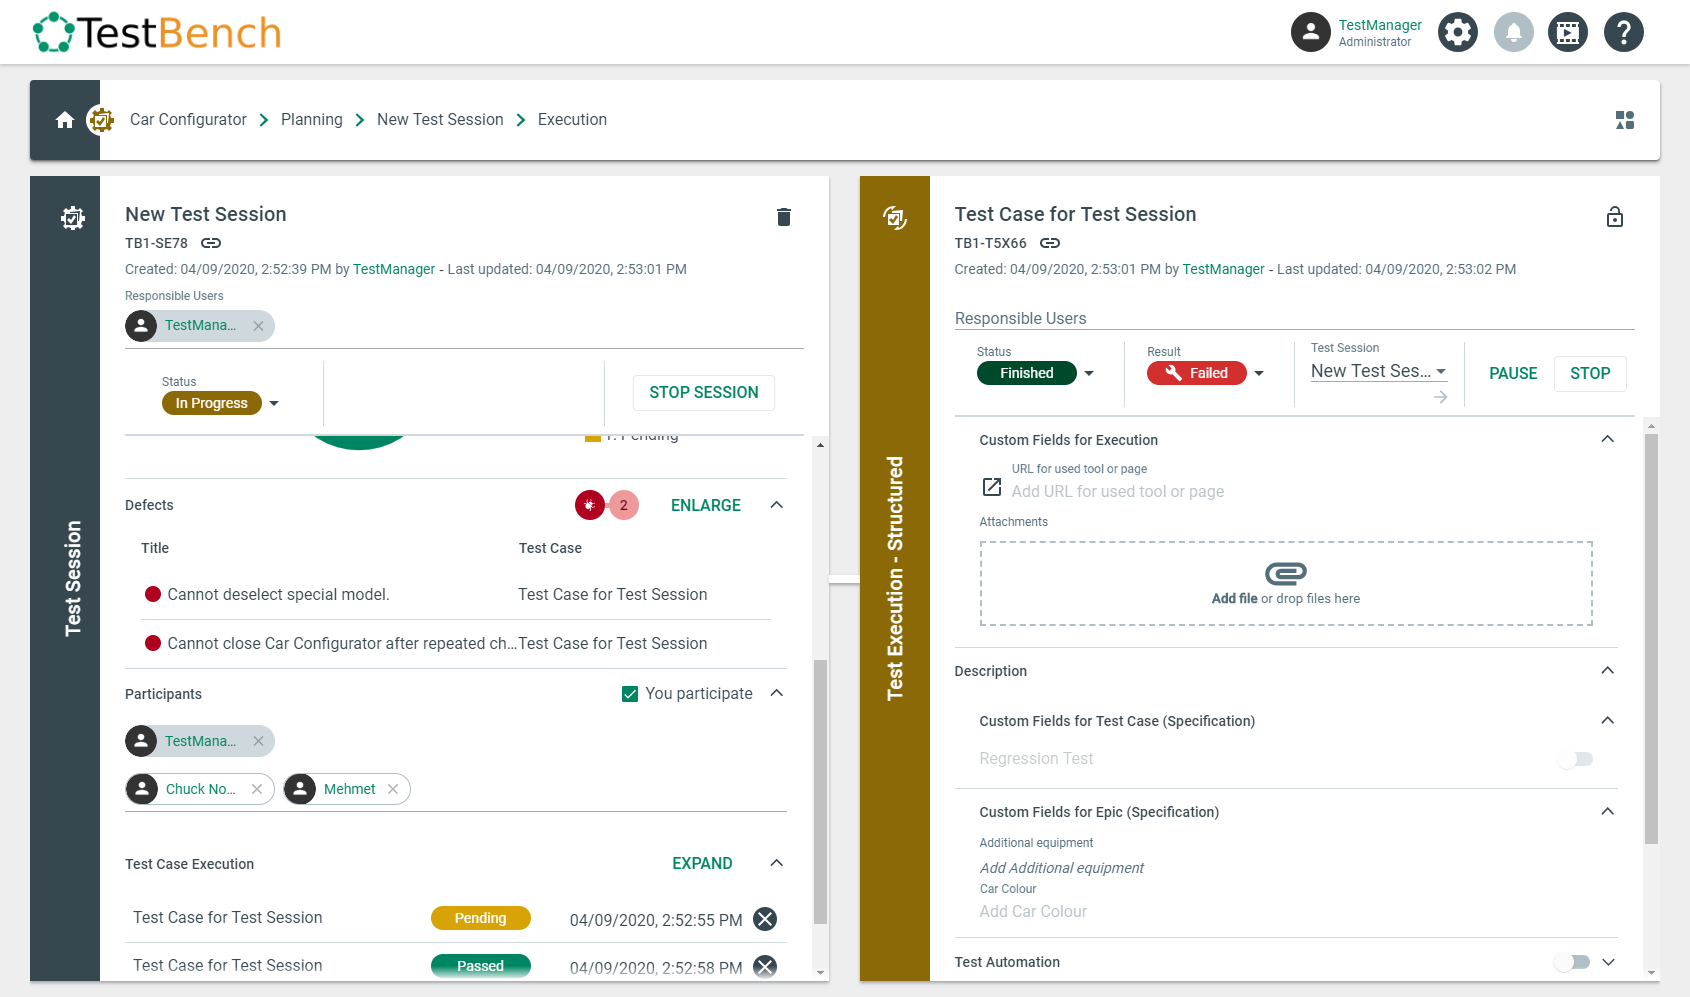
The brown gear icon with the checkbox in the header shows that you are an active participant in a Test Session.
![]()
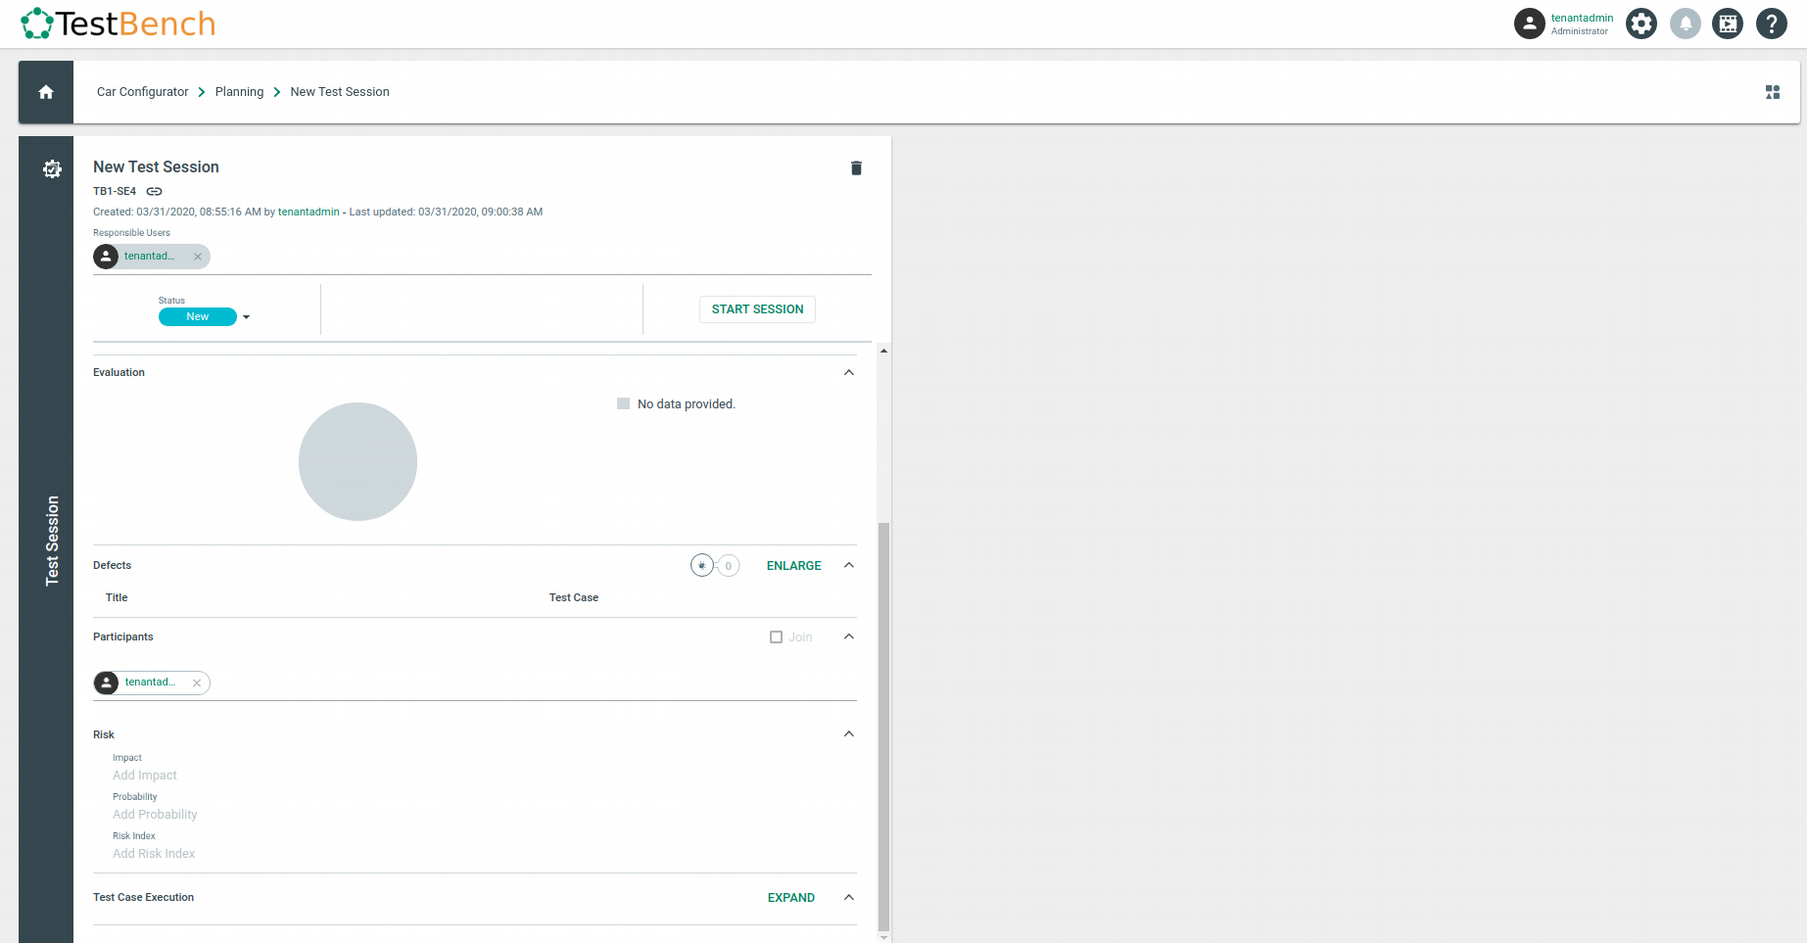
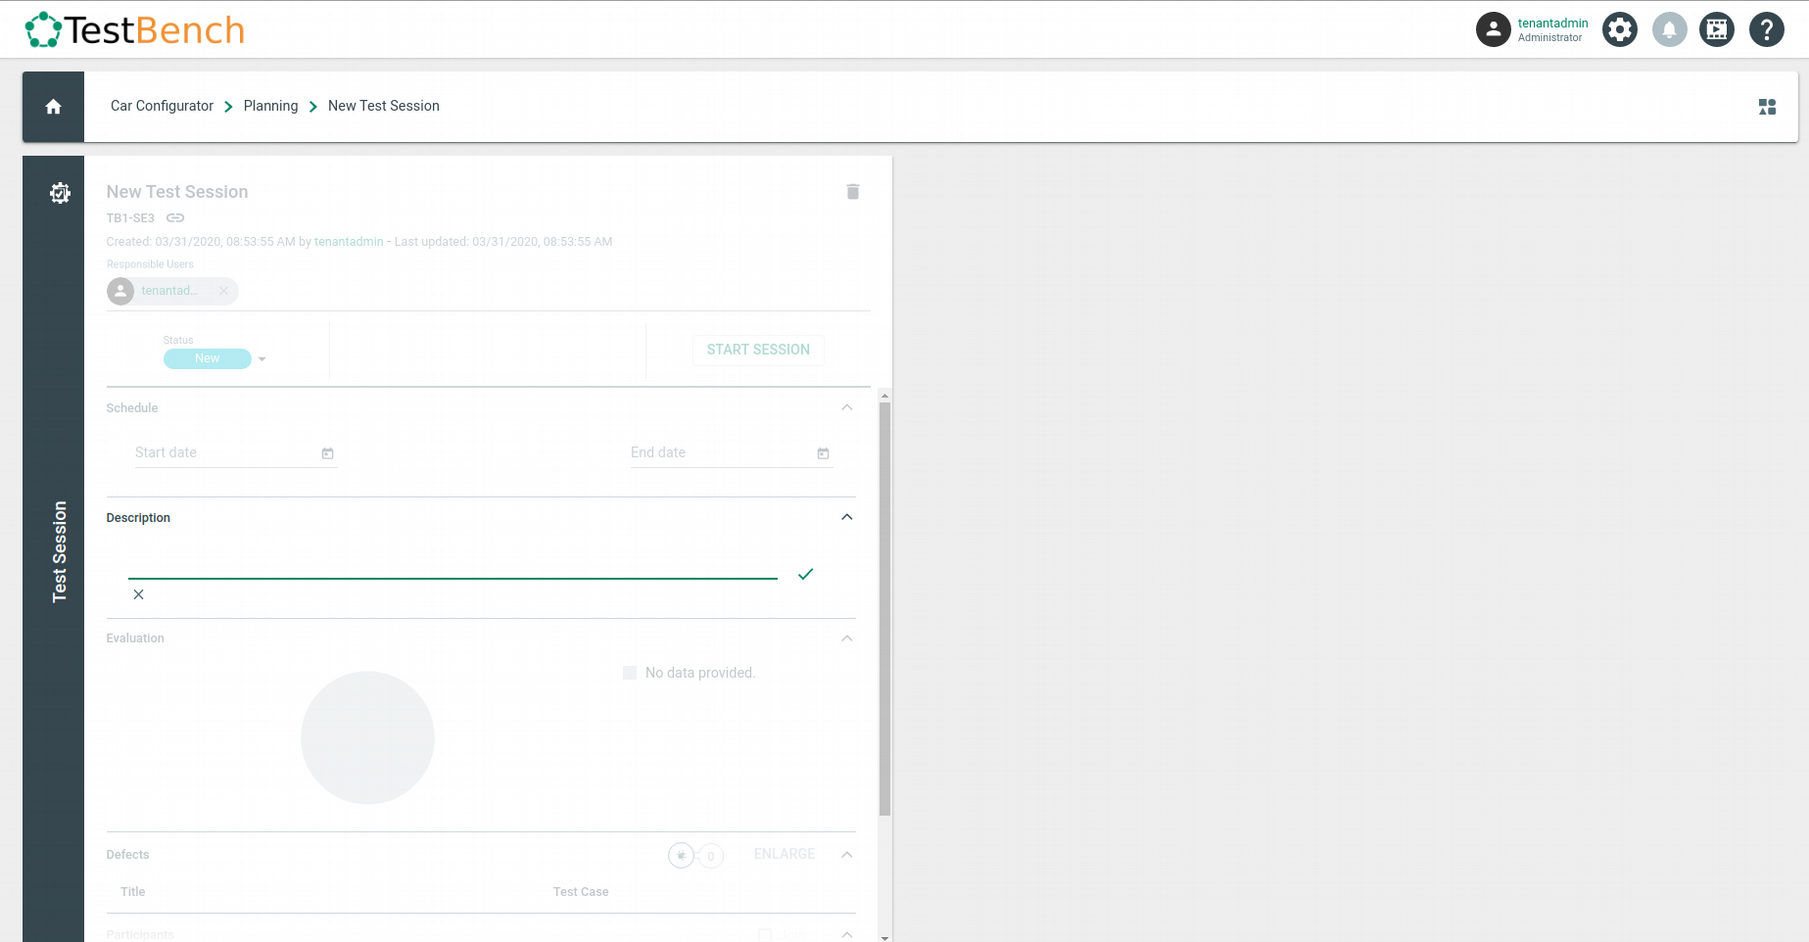
displays the title, the Test Session ID, and data used to create this Test Session. To change the title, hover over the field. The background gets gray, and you can click it. Enter the title.
The person who created the session is automatically the responsible user. To add further responsible users, click on the corresponding area, and choose one or more users from the list.
The status of a Test Session can be new, planned, ready, in progress, or completed. As soon as you click on “START SESSION”, the status of the Test Session changes to “In Progress”.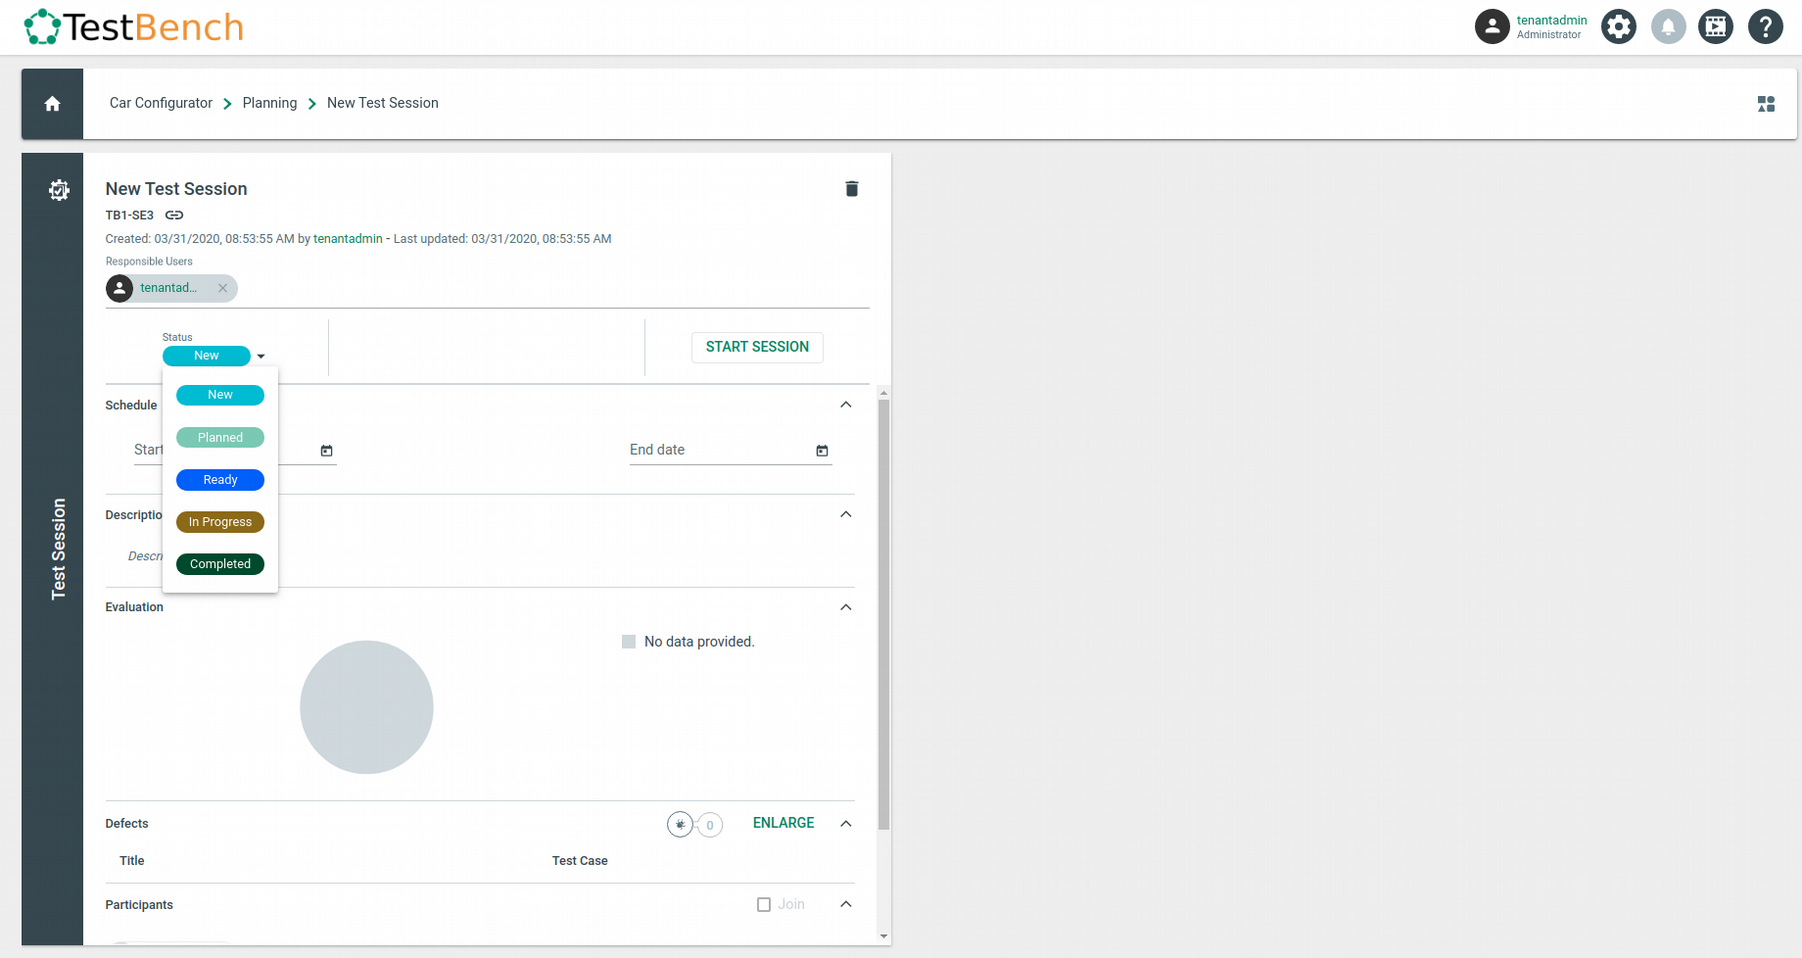
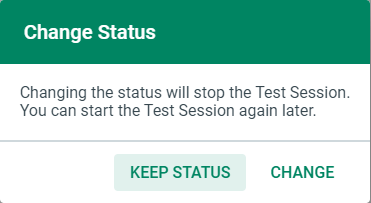
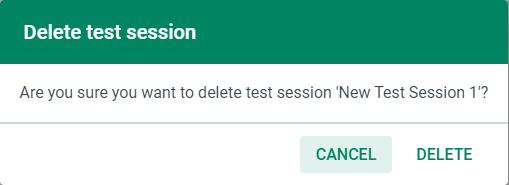
 | If a user decides to change the status of a Test Session, an active participant will become an inactive participant in that Test Session! |
To set the time-box for the Test Session, click on "Start date" or "End date". A time picker opens where you can make a selection.
Description
To add a description, hover over the field. The background gets gray, and you can click it. Enter the description.
Here, you can see a pie chart. If the Test Session has no executions, the pie chart is gray, and the legend shows “No data provided”. As soon as there are Test Executions, the chart shows the executions' status (how many are passed, failed, or in progress). The legend of the chart shows the number of execution’s status.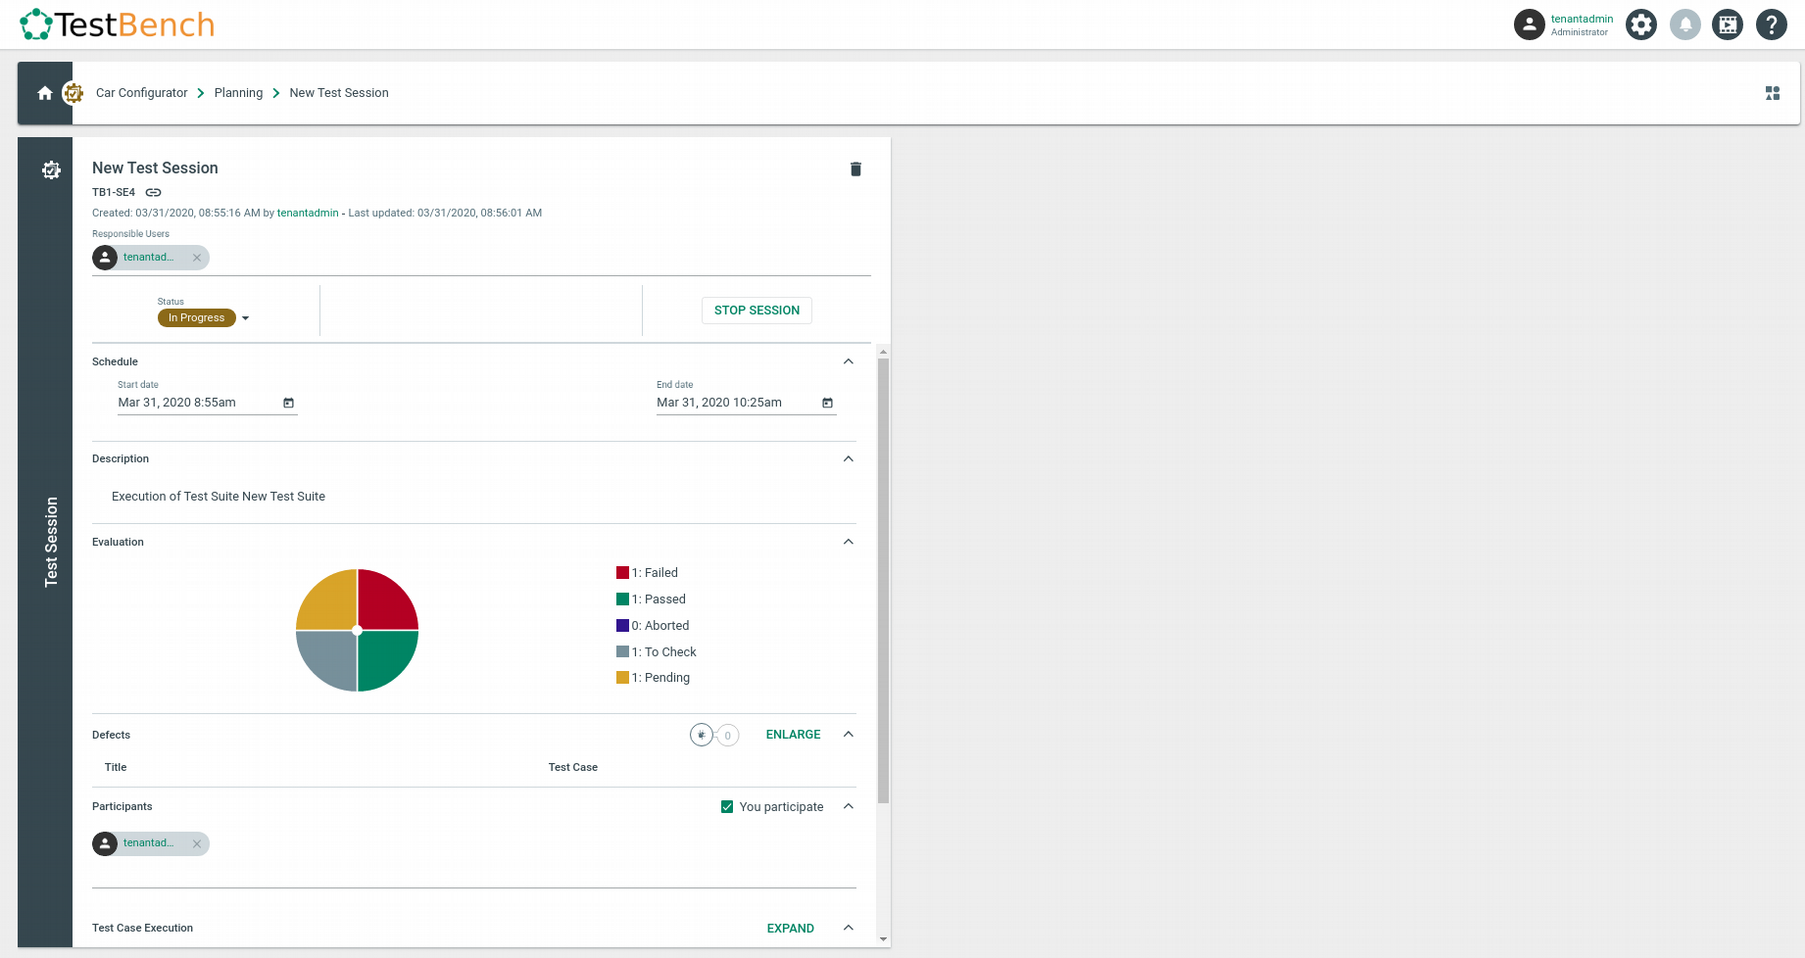
There are two types of participants of a Test Session: active or inactive ones.
Active participants of a Test Session appear in the top row of the participant's section with green letters and gray background.
Inactive participants appear in the bottom row of the participant's section with gray letters and a white background

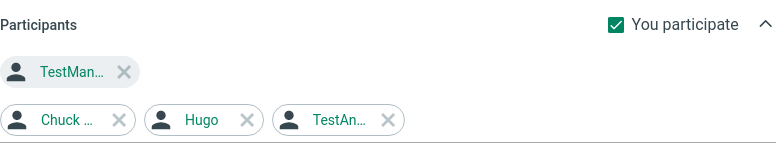
To remove a participant (active or inactive), click on the “x” symbol next to the participant's name.
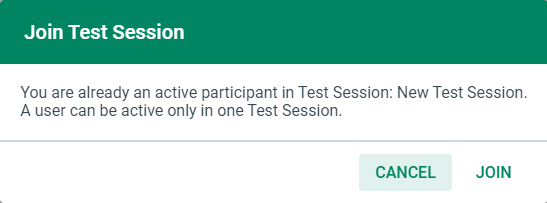
| A user can only be an active participant in one Test Session in a Product! If you are already an active participant in a Test Sessions and try to join another, a modal dialog opens. If you want to join another Test Session, click JOIN; if not click CANCEL. |
Here, you can see the list of all Test Executions that belong to the Test Session. It shows the execution name, the status, and the creation date. With a click on the “x” button, you can remove an execution.
If you click on one of the Test Executions in the list, the detailed view of this Test Execution opens.