How to execute Test Cases
When Test Cases are fully specified and all Preconditions for Test Execution are met, you can proceed to Test Execution. There are several ways to execute Test Cases in TestBench, and these are the subject of this chapter:
Creating a Test Session from Test Execution view
Creating a Test Session in the Planning section
Creating a Test Session for a Test Suite
Single Test Case Execution
The easiest way to execute Test Cases is to simply select the Test Case in the Specification section, for example, by using filters or using the Tree view and start the execution
.
Creating a Test Session from Test Execution view
You can create a Test Session to record the results of the Test Execution by selecting "Manage Test Sessions," as shown in the picture below.
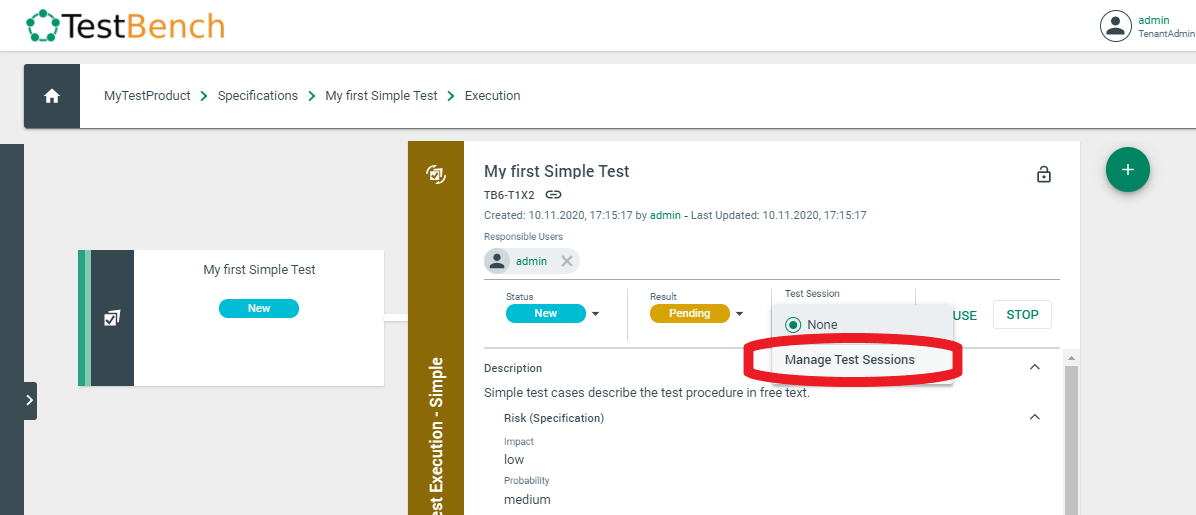
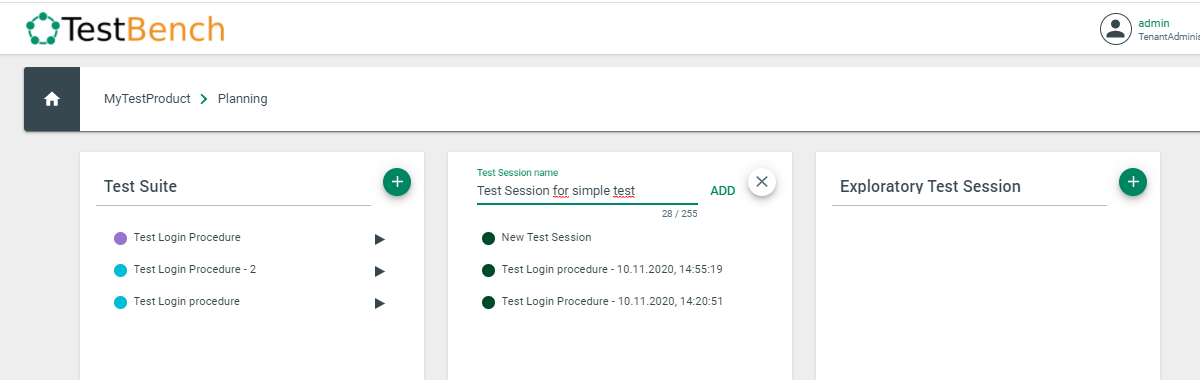
This will take you to the Planning section, where you can add a new Test Session.
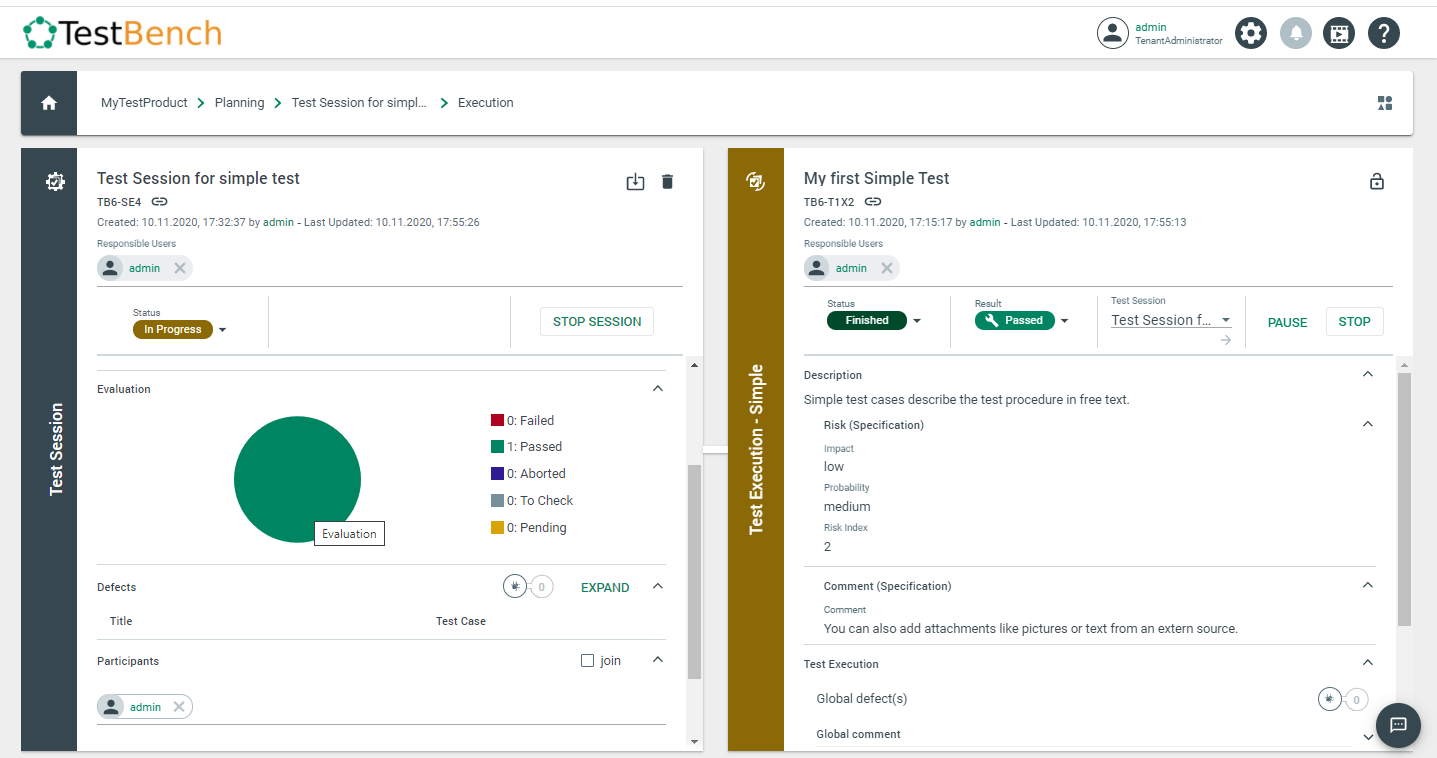
The detailed view of the Test Session opens. In the Test Case Execution section, you can see your Test Case. When you click on it, the Test Execution view opens, where you can enter the results of your Test Execution.
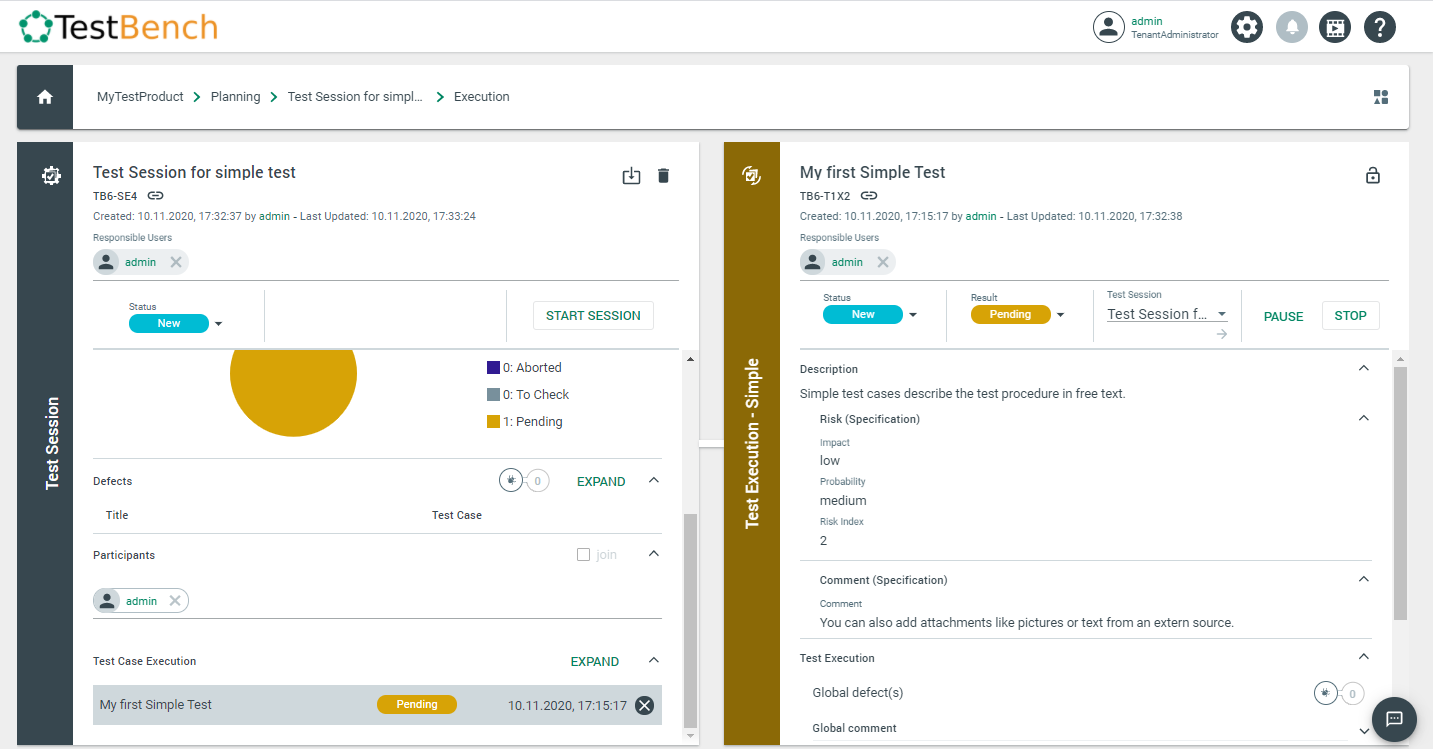
In the example above, it is a Simple Test Case, i.e., there are no individual steps that can be performed and checked off like in a Structured or Checklist Test Case. In this case, the test result (passed, failed, to check, or aborted) is entered manually after you have performed your Test Case.
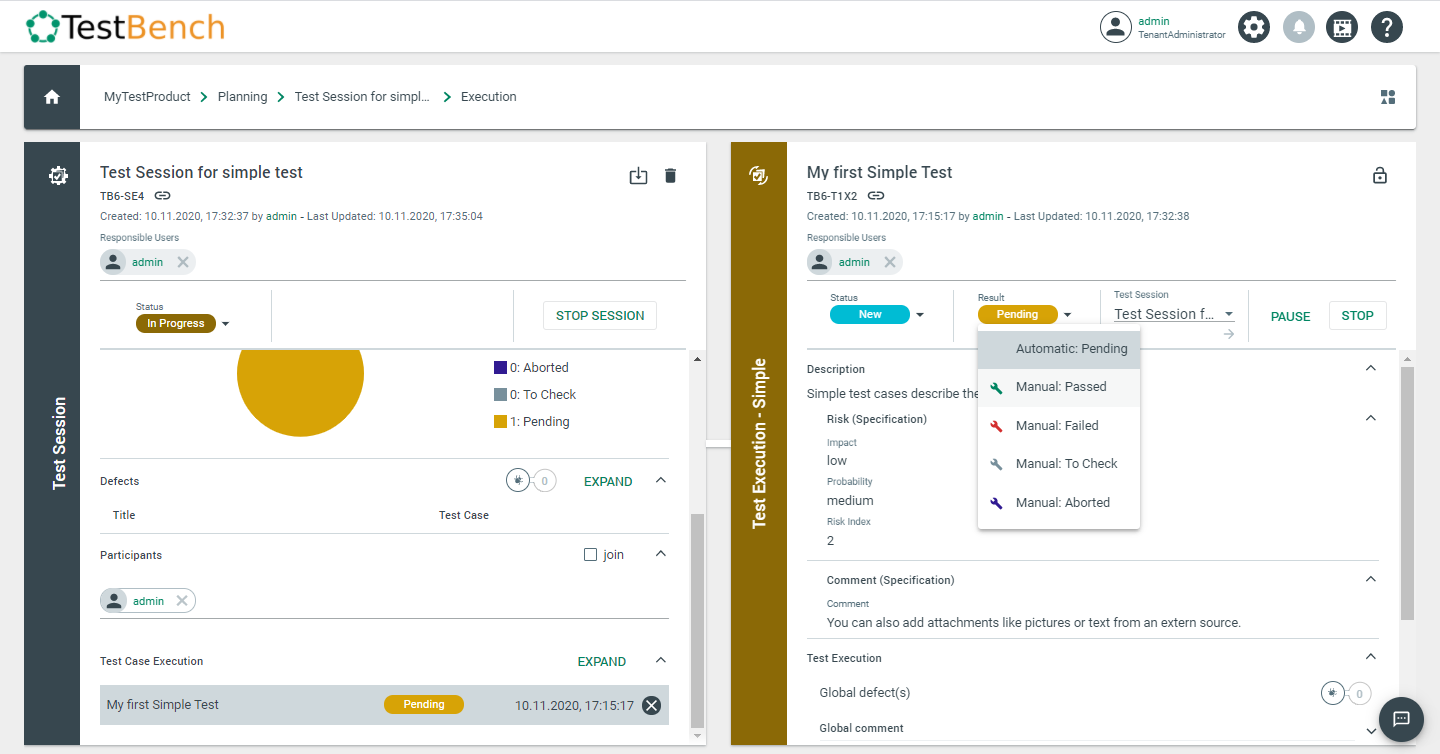
Once you have finished the Test Execution for this Test Case by clicking the Stop button, the test results will be updated in the Test Session.
In a (real) Test Session, you usually execute a number of Test Cases. In TestBench, a Test Session reflects the actual execution of all Test Cases during a session and summarizes the progress and test results.
To add Test Executions to a Test Session, you must be an active participant in a Test Session. To become an active participant in a Test Session, click the “Join” checkbox. It is enabled as soon as the Test Session is in progress. If you are an active participant, the “Join” checkbox is replaced by the “You participate” checkbox.
Once you have joined the Test Session, all subsequent Test Executions are automatically added to the Test Session until the Test Session is closed.
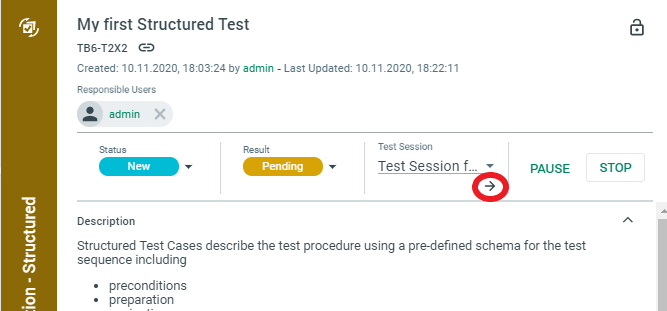
To do so, you need to navigate to the Specification section to select the desired Test Cases either in the Tree view or by using a filter. Don't worry; the Test Session remains open in the background even if you change the view. Continue with your Test Session by running the current Test Case. By the way, you can return to your Test Session at any time by clicking on the small arrow below the Test Session name (see figure below) or on the "Running Test Session" icon in the upper left corner of the screen 
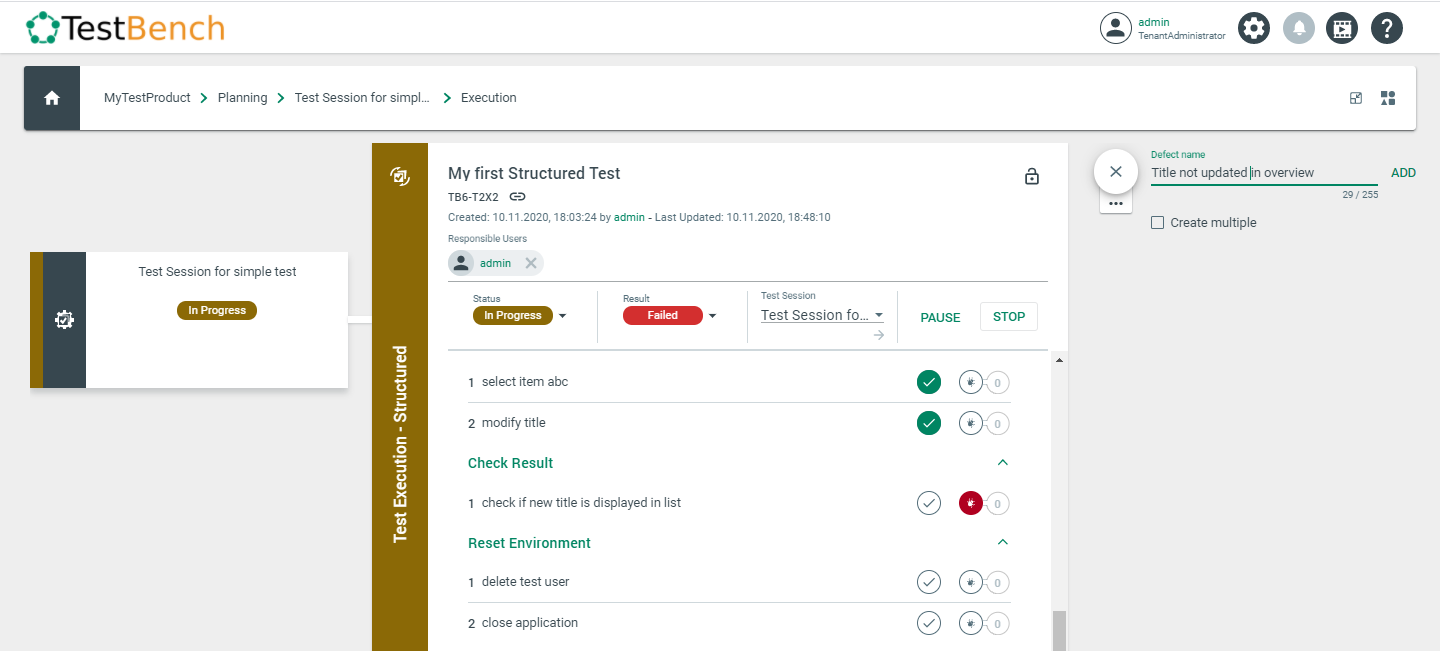
In this example, the Test Case is a Structured Test Case with individual steps, which must be executed in your system under test one after another and checked off in the TestBench Test Execution. To mark a test step as "passed," click on the icon with the hook. The icon turns green. To mark a test step as "failed," click on the icon with the bug. The icon turns red, and you should enter a Defect report for the problem that caused the test step to fail.
Follow the procedure described above for each Test Case you want to run in this Test Session. When you are finished, you can close the Test Session by clicking on 
and your Test Session will be displayed as " Completed" with the results of the individual Test Cases as well as an evaluation of the entire Test Session. You can also create a report for your Test Session.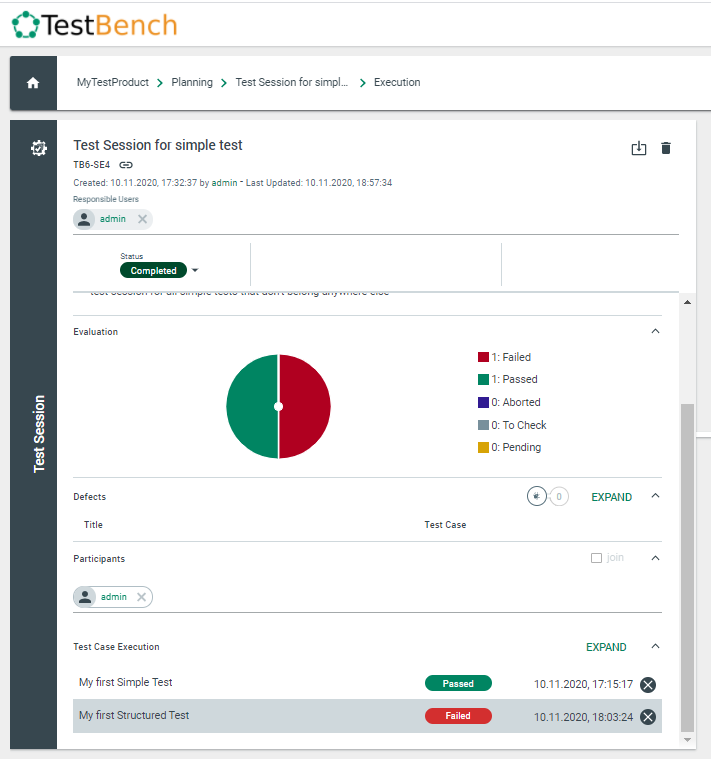
Creating a Test Session in the Planning section
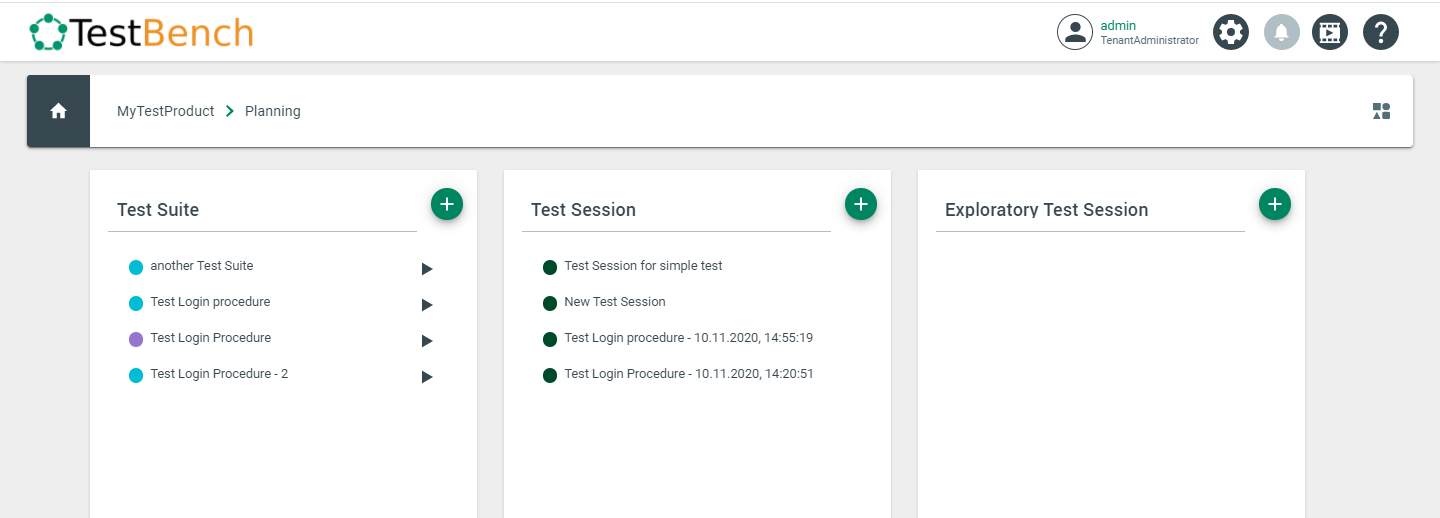
Another option is to create the Test Session directly in the Planning section by selecting the Plus button in the Test Session tile. The next steps are the same as described above. The only difference is that you start with an empty Test Session and then add Test Cases, whereas, in the example above, you started with the first Test Case of your Test Session.
Creating a Test Session for a Test Suite
If you have Test Suites with predefined sets of Test Cases, you can easily create a Test Session to execute all Test Cases contained in a Test Suite (see also chapter "How to create and manage test plans").
To create a Test Session for a specific Test Suite, go to the Planning Section and either click directly on the Run button  or first open the Test Suite's detailed view by clicking on its title, for example, to check whether you have selected the correct Test Suite.
In the detailed view of the TestSuite, you can start the Test Session by clicking on  which opens the following screen.
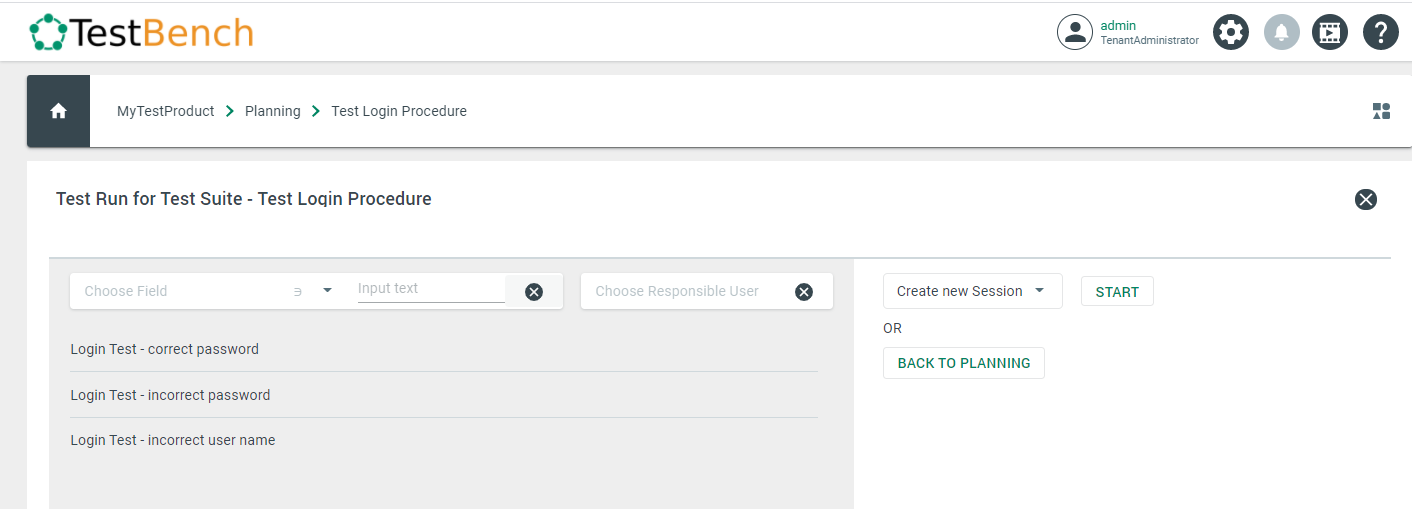
Click  to create the new Test Session with all Test Cases belonging to the selected Test Suite.
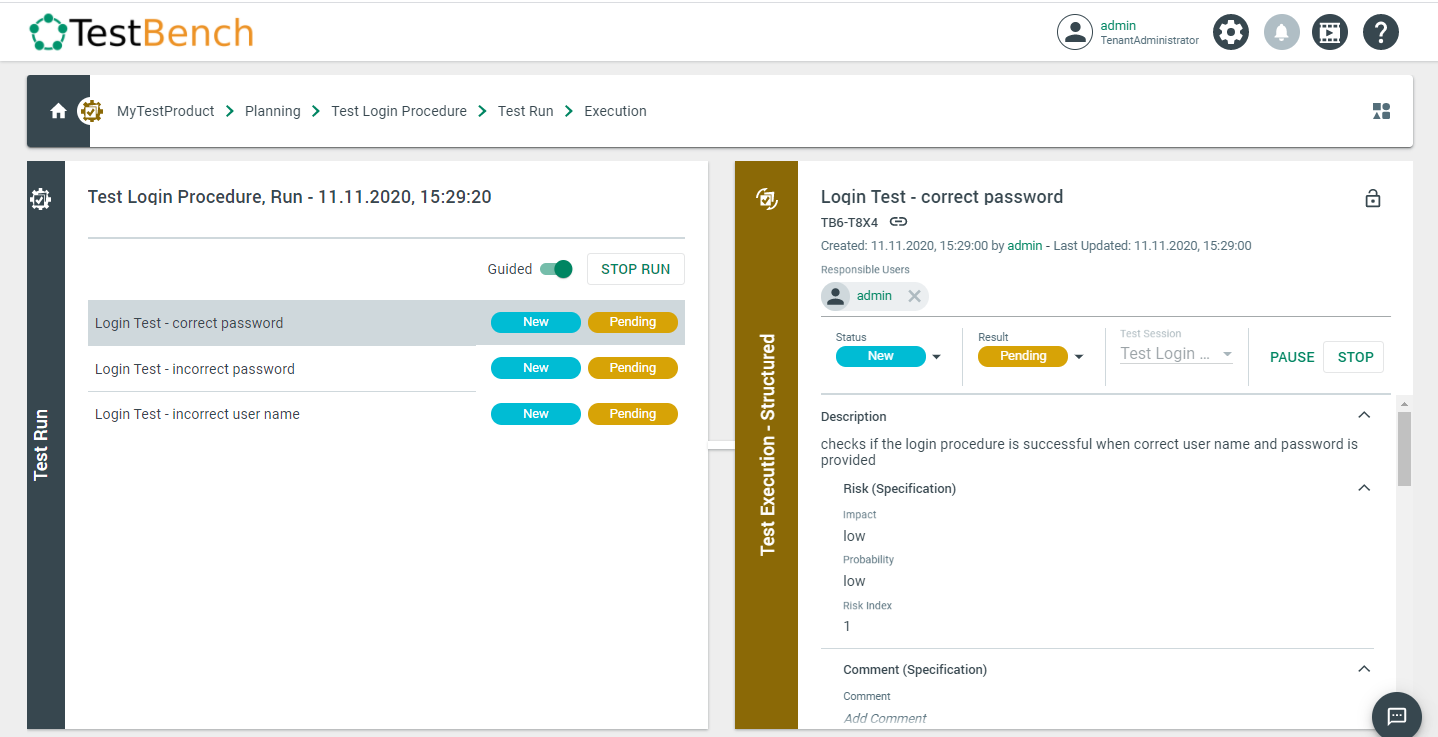
Now you can run your Test Cases one by one, and the results are updated in the Test Session.